Showing posts with label Stop Pinning and Make Something!. Show all posts

Saturday, September 2, 2017

Stop Pinning and Make Something! September Link Party

Project: Art Box
Pinterest Board: Mixed Media Mayhem
Pin: HERE

"Window into My Art" box
When I spied the whimsical painted box filled with tags over at The Kathryn Wheel I instantly knew I had to make one for my art.

The Process

 This wooden box had been sitting in my class storage room for a while holding miscellaneous junk.  It was the perfect size.

After paining it white with acrylic paint I began the process of decoupaging it using my favorite decorative napkins.

Beginning with the sides then carefully folding the napkin over the lip of the box towards the inside.

 Completed side after drying for several hours.

 Inside bottom of box

It took all day, working on one side at a time, with one hour of drying time in between to get all four sides and the inside covered.  I used the leftover scraps to cover the partitions.

After allowing it to dry for several days (Michigan humidity) I began decorating it using stamps and paint.

Hardware

After completing some "research" via Pinterest, I decided to use Tim Holtz Idea-ology FOUNDATIONS Metal Box Feet Foundation and Tim Holtz Idea-ology ORNATE PLATES.  


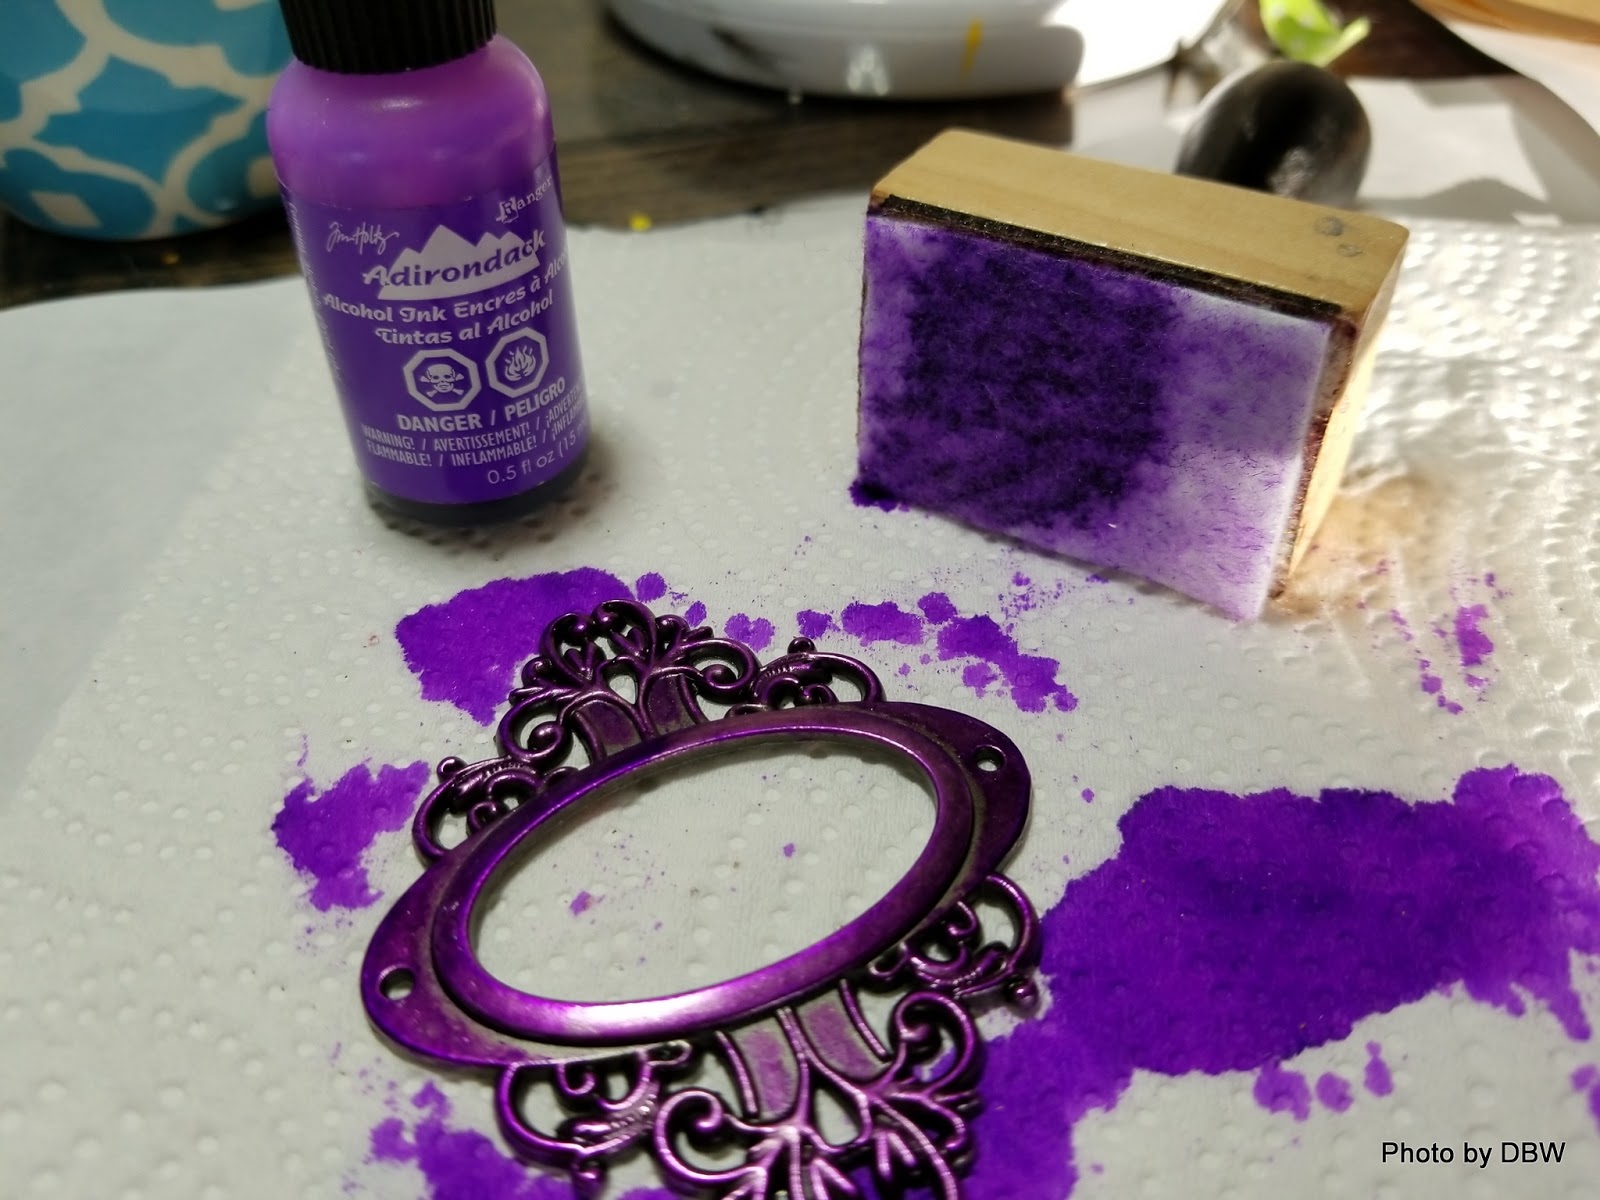
I like how the purple ink seeped through the white embossing

I used this same process for the feet:


This is the glue I went with for attaching the metal pieces to the box.


Finishing Touches

At this point the project stalled as I grappled with how to finish decorating it.  My original thought was to add flourishes but I could not seem to find or make the right ones.  After pursuing the local craft stores I happened upon these chipboard words.  To get them to match the grunge look of the metal I first gessoed them, paying close attention to all the edges.
`

After the gesso dried I covered each word with Distress Oxide ink then embossed them using the same embossing powder used on the metal pieces.

Some of the purple ink peeking through.

Tinted this lace with Dylusions ink spray in bubblegum pink

Eye Candy


Completed box

Inside partitions

Front view

Side view

Back view

Side view

Adding a few of  my art pieces

 It's Your Turn!

Grab the button, start creating and share your link below.
• Please use the direct URL to your blog post rather than to the blog itself.
• If using Flickr or Instagram, use the URL to the photo.
• Include the link to your Pinterest board and pin you used..
Remember to link back to THIS direct URL in your posting.

Go Here to learn about Stop Pinning and Make Something!

Thursday, August 3, 2017

Stop Pinning and Make Something! August Link Party


How many pins have you actually made from your Pinterest boards?  Our boards are full of inspirational ideas and projects we want to make "someday".   It’s time to Stop Pinning and Make Something!  a monthly link party to get people creating those pins on their Pinterest boards! 

Goal:
To get people creating!  Get out those paint brushes, that saw & sander, open the varnish, unpack your knitting needles or crochet hook!  Let’s make one of those pins sitting idle on your Pinterest boards. It can be as small as learning a new technique for creating ATC's to as big as making a garden shed!  Your pins are your limit.


Project: Tie Dyed Sneakers
 Pin:  HERE

This is an easy project but be forewarned, there is a lot of drying time involved.  I did watch the video twice before starting.
I selected these colors.  Note: the metallic markers do not work for this
I chose to color both shoes at the same time so they would have the same pattern.
Don't forget to color the tongue
 Coloring completed:


after applying the alcohol:
After drying for 24 hours, I applied  fabric Mod Podge which takes an additional 72 hours drying time.

Beautiful!  

It's Your Turn!

Grab the button, start creating and share your link below.
Please use the direct URL to your blog post rather than to the blog itself.
If using Flickr or Instagram, use the URL to the photo.
Include the link to your Pinterest board and pin you used..
Remember to link back to THIS direct URL in your posting.

August's link party closes August 30th at 11:55 pm.

Wednesday, December 2, 2015

WOYWW: art journal completed

Lots of bright colors on my desk.  Here, I am putting the finishing doodles on the art journal cover before sewing in the paper bundles and inside pockets.

 sewn in pocket
 Completed journal (inside) You can see the sewn bundles of paper I was working on last week.  Sewing on cardboard proved to be challenging. 

Completed cover
Stop by and see all the photos HERE.  I am very proud of this project!  And happy I finished it before the holiday rush.  I am going to make another one using all the Christmas cards I get this year.  Obviously it will have to be much larger.  

Joining up with What’s onYour Workdesk? Wednesday where desk snooping is not only allowed but all part of the fun!  Won’t you join us!

Stop Pinning and Make Something! December monthly link party

How many pins have you actually made from your Pinterest boards?  Our boards are full of inspirational ideas and projects we want to make "someday".   It’s time to Stop Pinning and Make Something!  a monthly link party to get people creating those pins on their Pinterest boards! 
Goal:
To get people creating!  Get out those paint brushes, that saw & sander, open the varnish, unpack your knitting needles or crochet hook!  Let’s make one of those pins sitting idle on your Pinterest boards. It can be as small as learning a new technique for creating ATC's to as big as making a garden shed!  Your pins are your limit.


Project: Cardboard Crush Art Journal: An Art to the 5th Workshop
 Pin:  HERE

When I first watched the video for this course I knew I HAD to take it!  I paid for it but the summer somehow flew by and before I knew it, school started and my life got full of lesson plans, parent meetings and grading stacks of papers. 
This month, before the holiday rush got started I wanted to get this class completed.  I watched the videos, gathered the supplies and got started. 
Because this is a purchased class, I cannot share measurements or specifics.  I am not advertising for the class either.  This was a pin I stumbled on and thought it would be fun to do, which is was!   I have plans to make more, one involving using all those Christmas cards I get in the mail.

Journal Cover


I have cut the cover, scored the folds, and gessoed it.  Yes, there is a paw print.  One of my “helpers” added his take on the project. 

Tore strips of paper and used Decou-Page to glue them down on the outside of the cover.I allowed it to dry several hours before painting it.  


I wanted the cover to be bright and colorful so I chose a favorite stencil,  Dylusions ink sprays and let loose.  
The carnage.


I painted over the ink spray with Dylusions paint then doodled with my Sakura Gelly Roll Moonlight pens.
After it all dried i decided to paint over some of the flowers with this iridescent medium I found.  

 This jar cover was sitting in my stash waiting for the perfect project.  I decided to use it as a closure for the the journal.  After I glued it on, I painted some of the iridescent medium on the flower.


Inside cover

Book pocket
 Inside cover painted and pocket sewn in.

Journaling book slid into the pocket

The sewn bits of paper

I went through my stash and pulled out cards and bits of paper that I had saved to create the bundles of that would be sewn on the left inside cover. 


Finished project

Inside journal

 Pen hanging from Sari ribbon and sewn in tab

 Front cover

back cover


It's Your Turn!
Grab the button, start creating and share your link below.

Please use the direct URL to your blog post rather than to the blog itself.
If using Flickr or Instagram, use the URL to the photo.
Be sure to recognize and give credit to the originator.
Include the link to your Pinterest board and pin you created.

Remember to link back to THIS direct URL  in your posting.